
Back 
I. Network selection
II. App selection
III. Link structure
IV. User destination
New user: attribution
Existing user: reattribution
VI. Setup review
VII. Link sharing
09 feb 2024
Reliz Ad Platform x Adjust – Integration guide
I. Network selection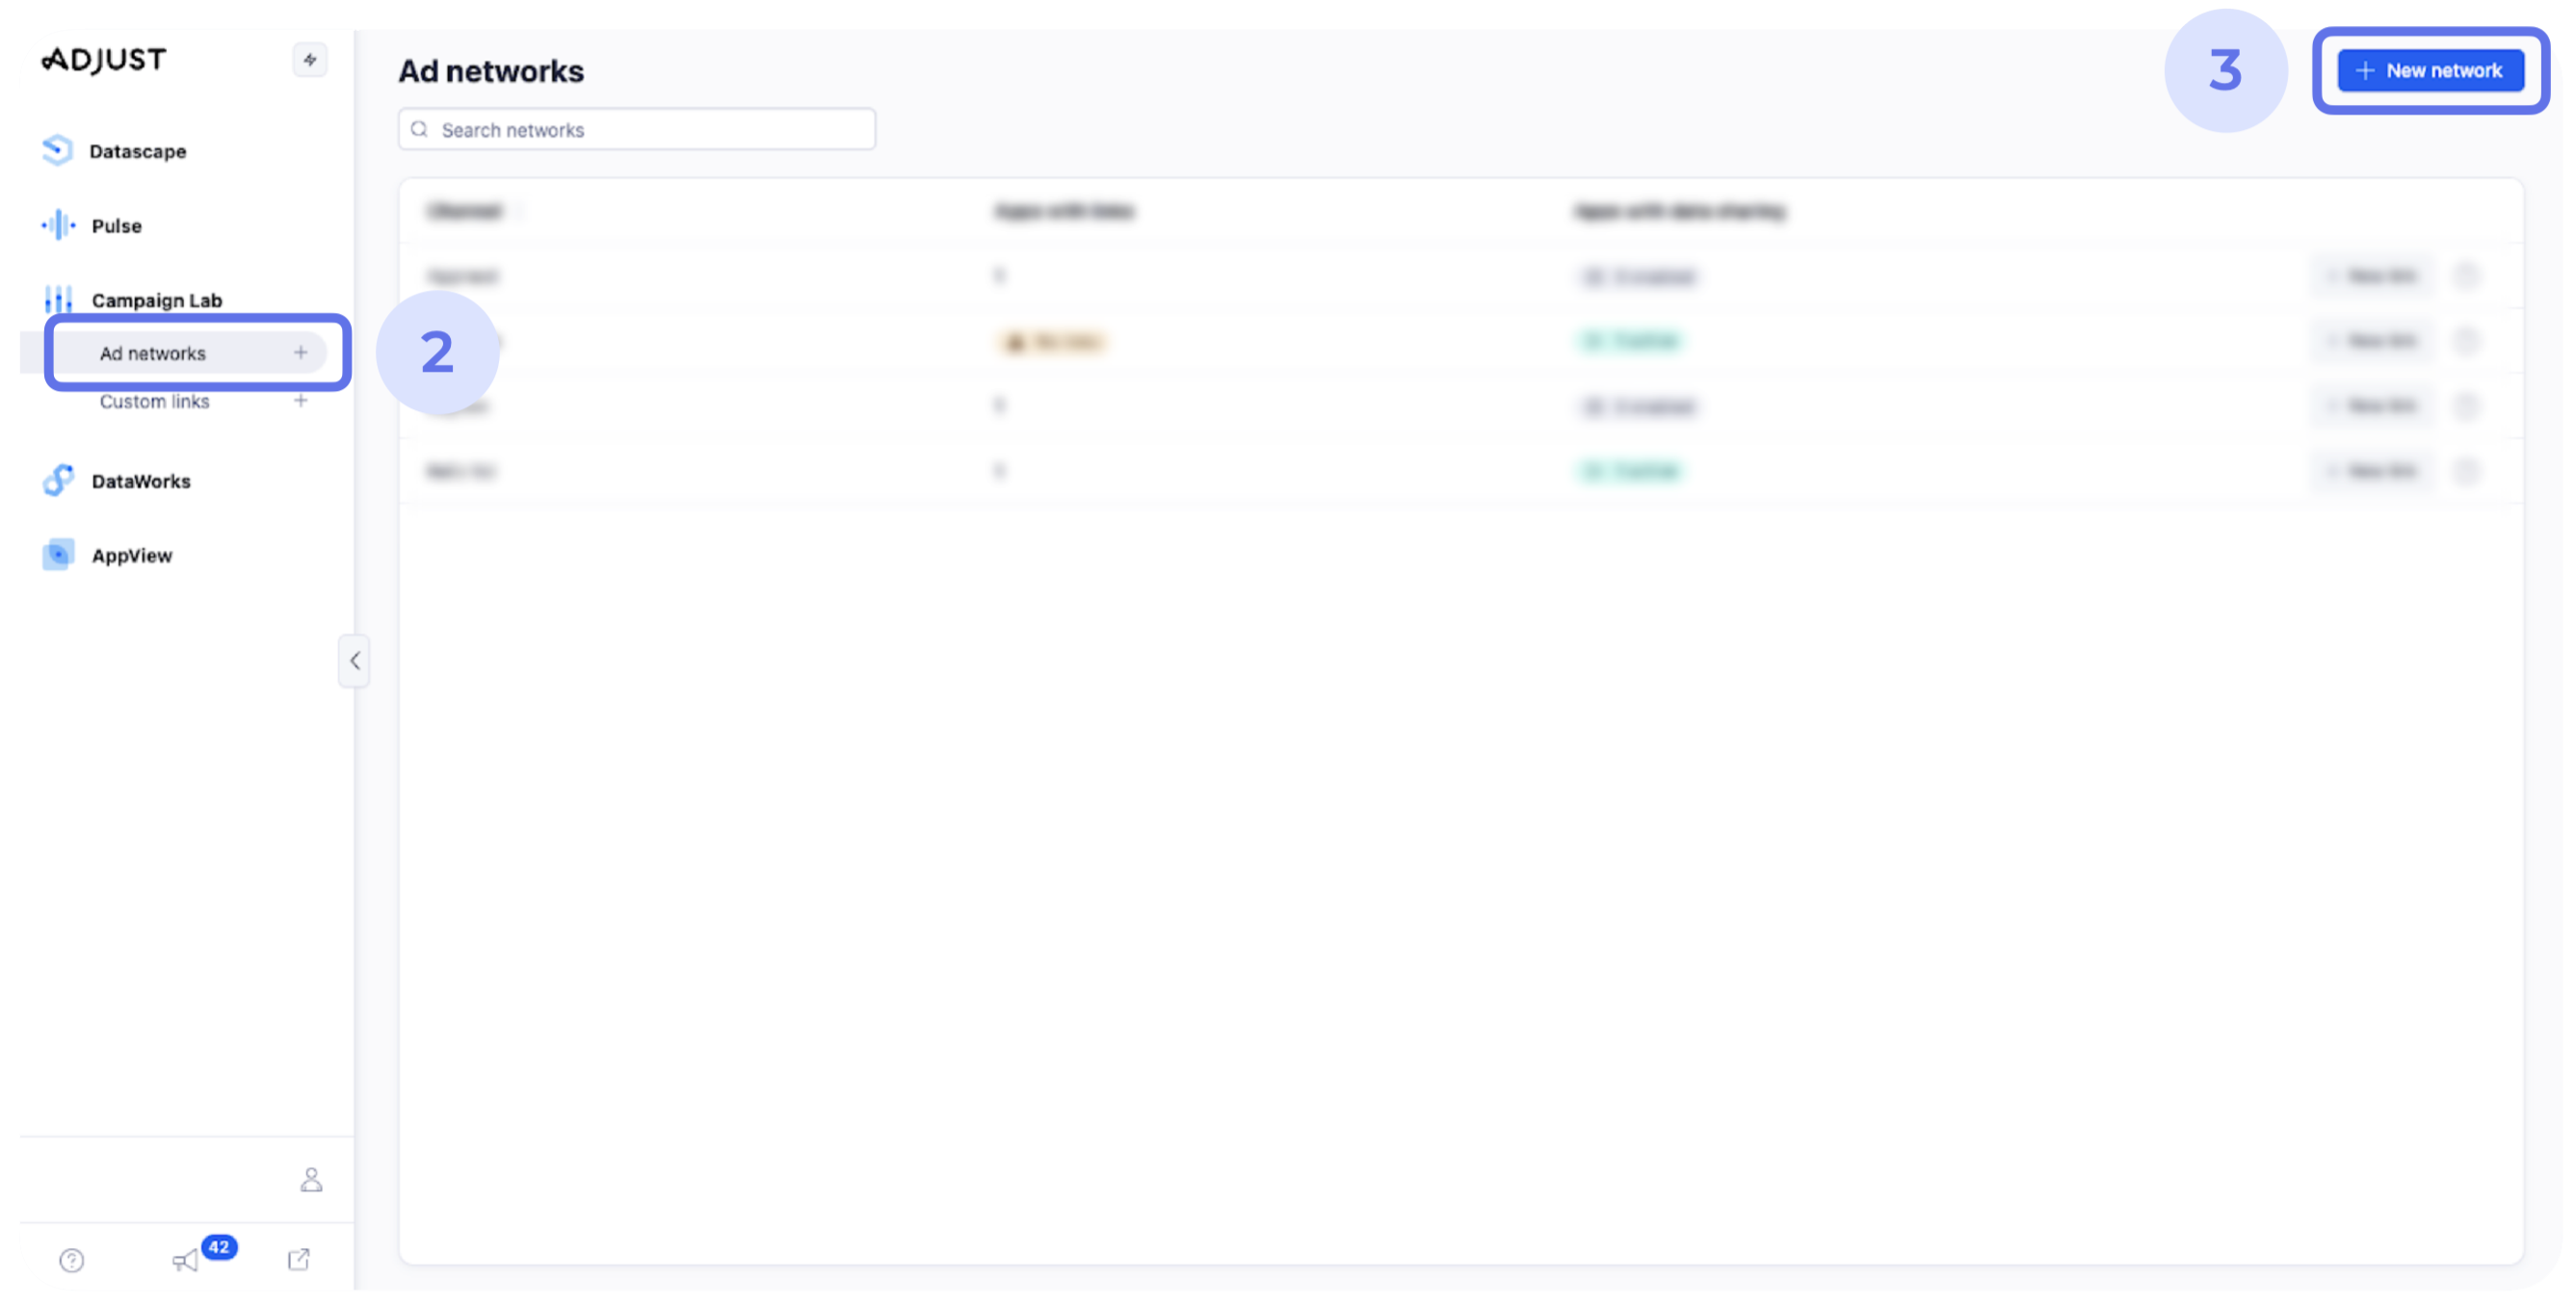
1. Open the main page suite.adjust.com.
2. Click on “Campaign Lab” > “Ad Networks”.
3. Сlick on “+ New network”. 
4. Search for “Reliz LTD”.
5. Click on “Reliz ltd”.
6. Click “Next” in the bottom corner to get the integration started.
II. App selection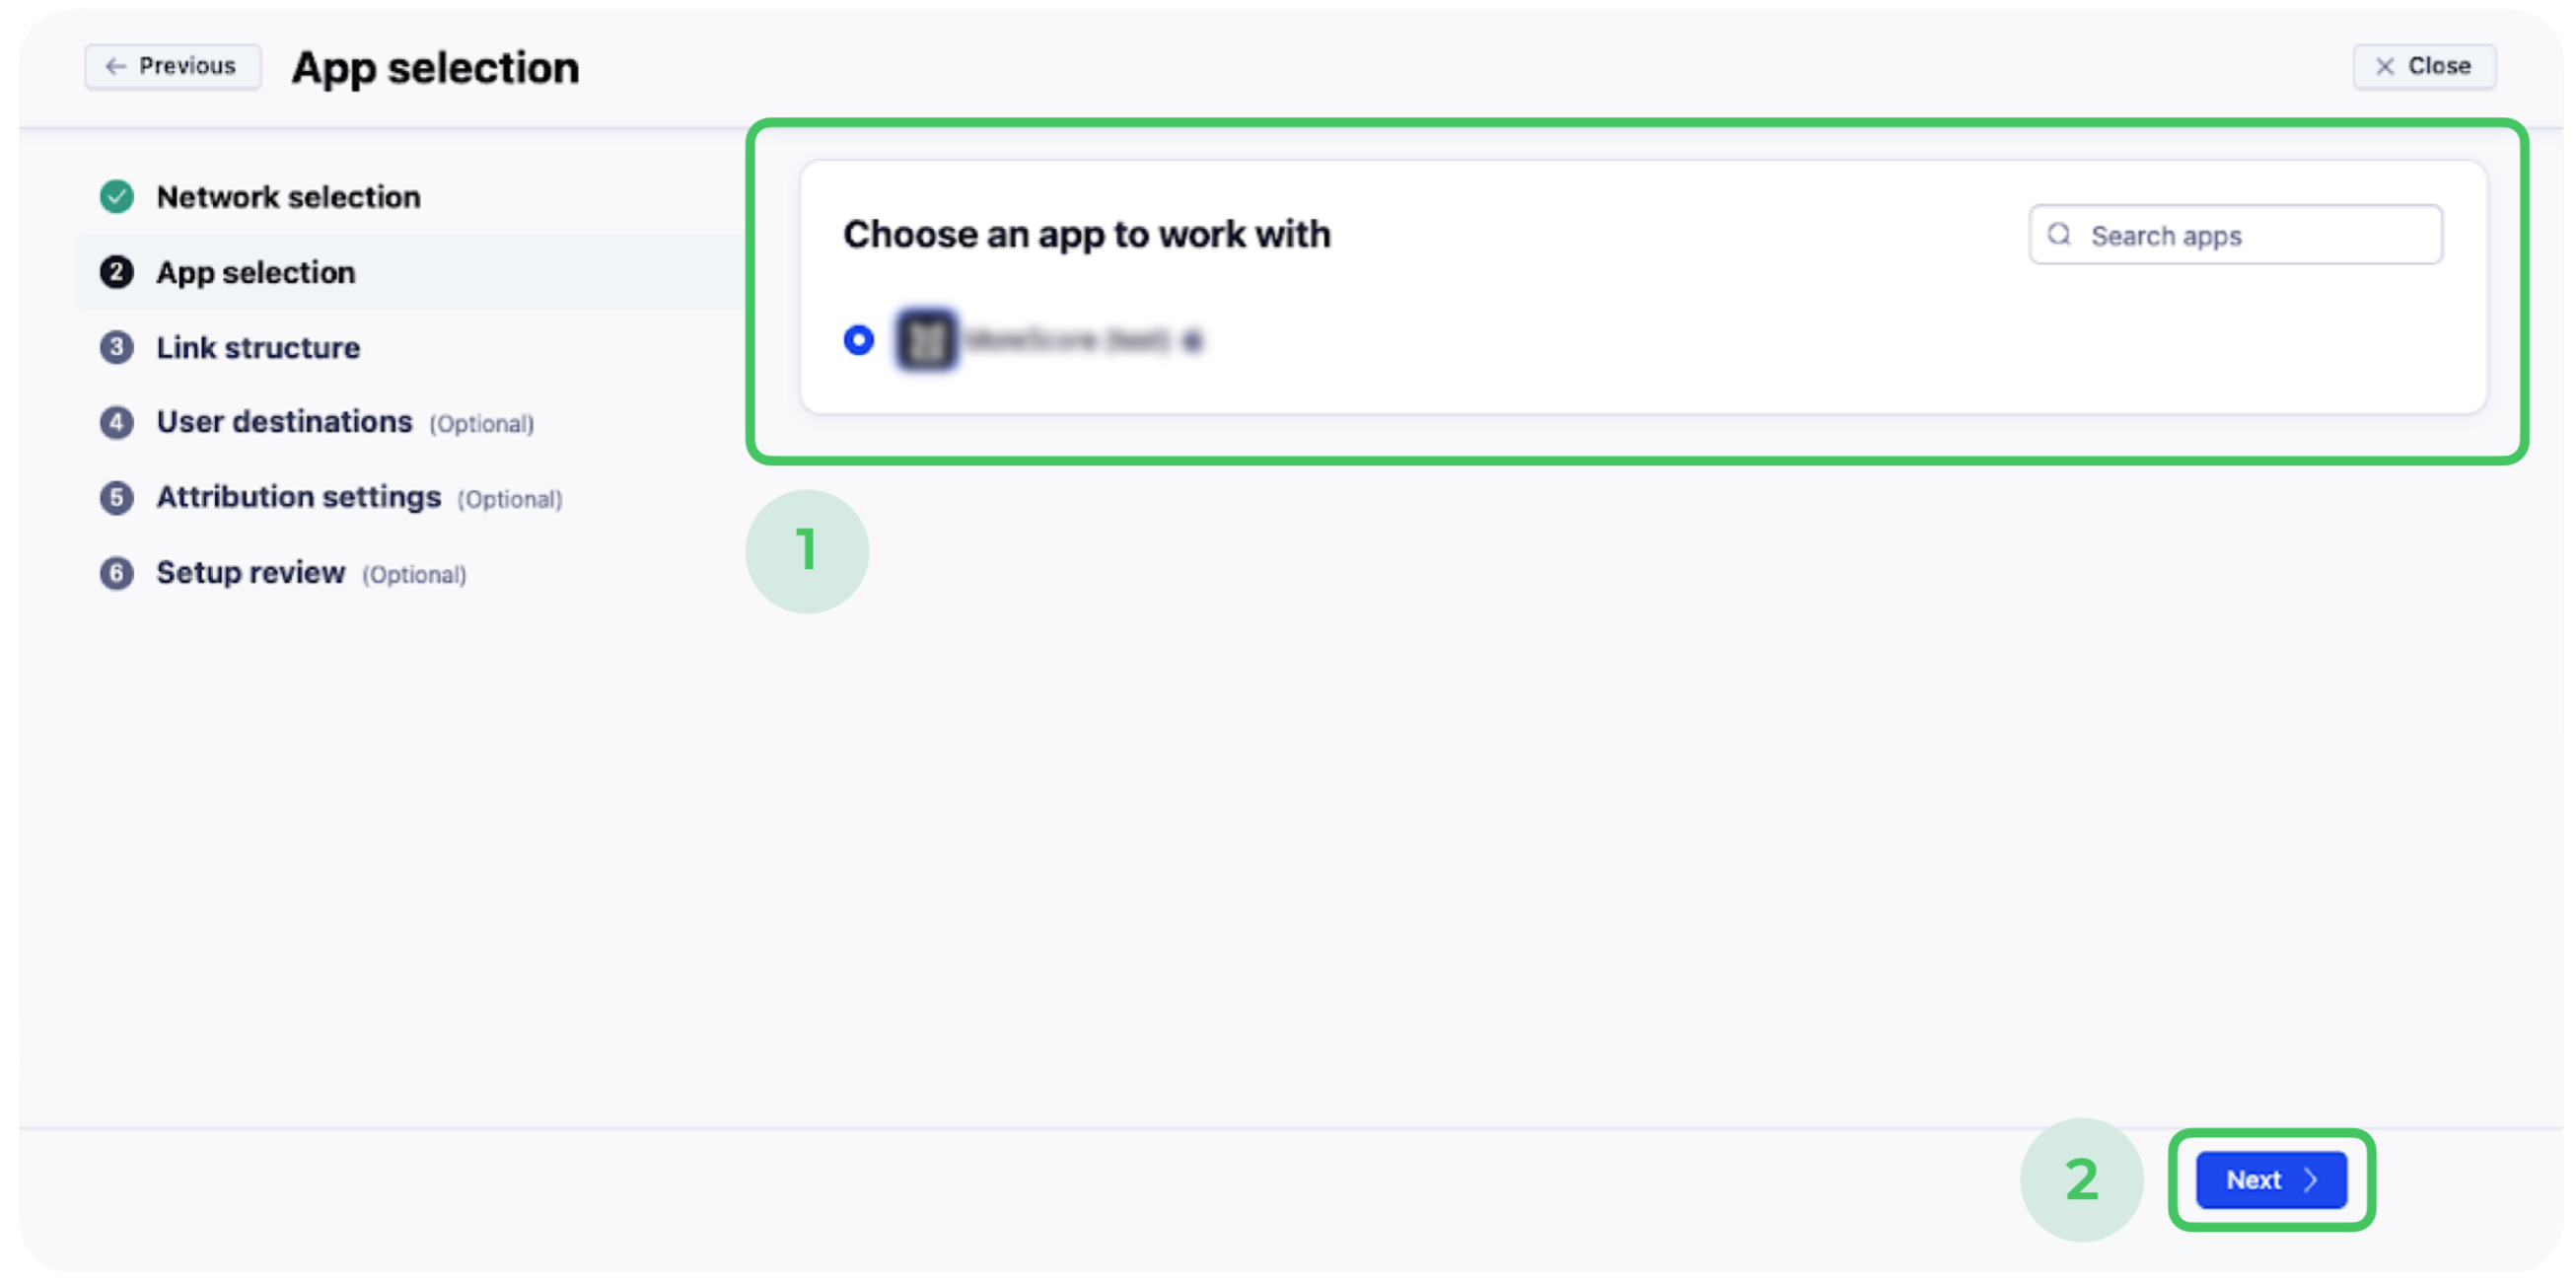
1. Select an app you want Reliz Ad Platform to be integrated with.
2. Click “Next”.
III. Link structure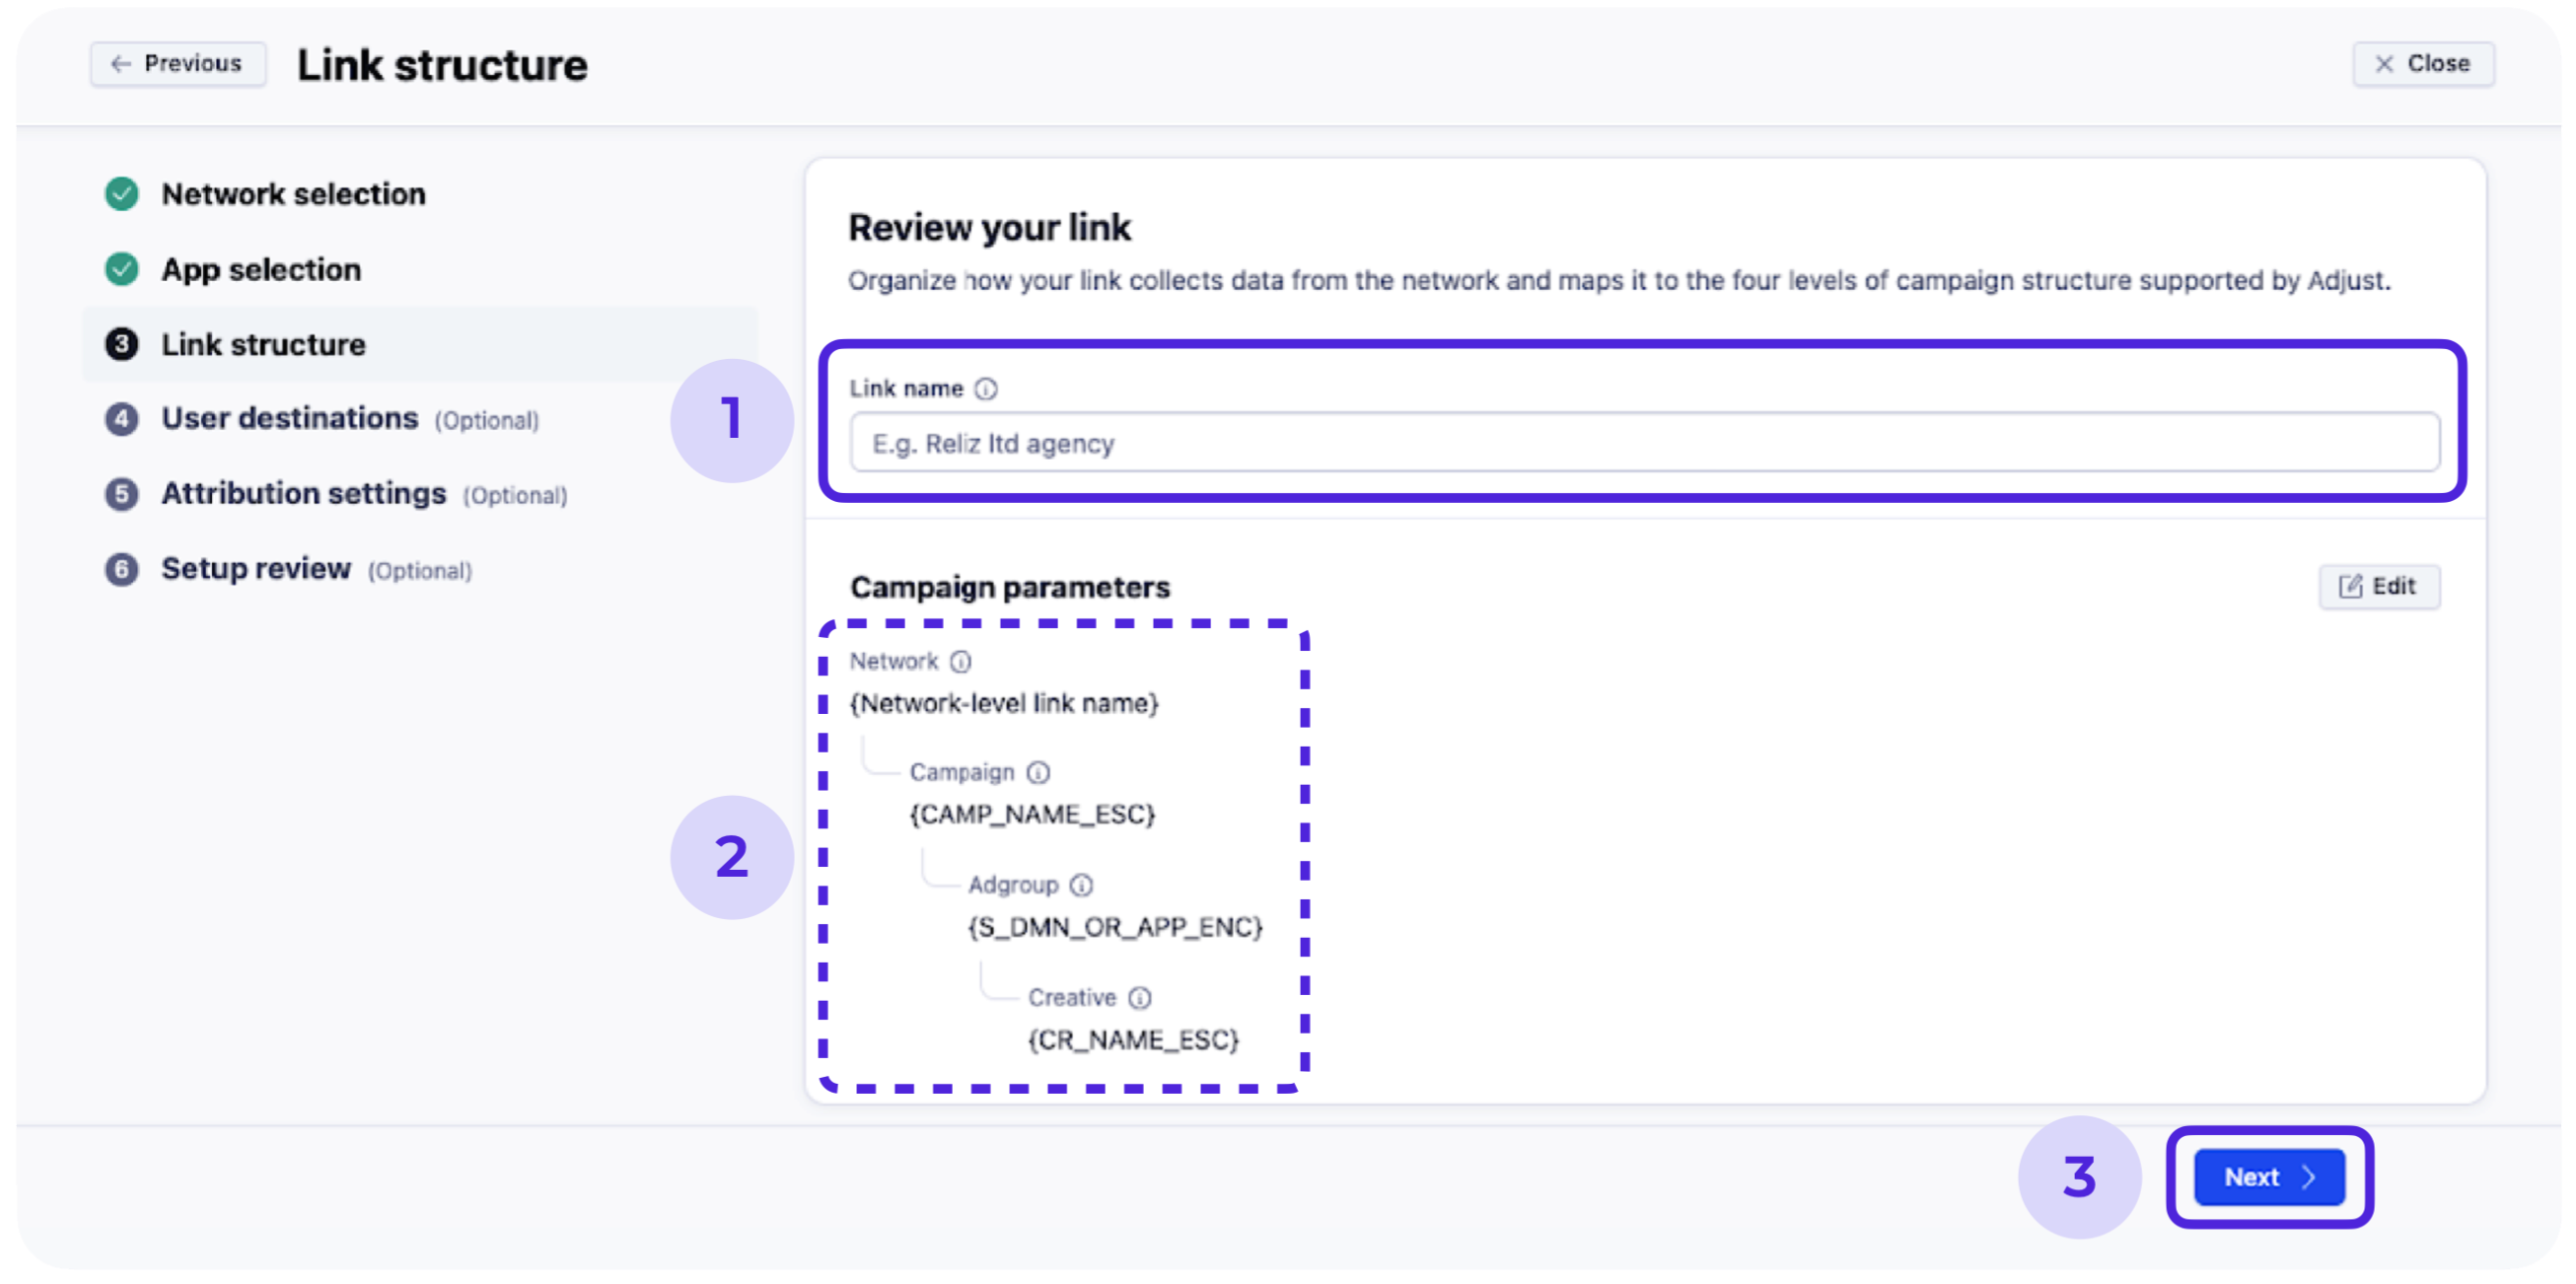
1. Create a Link Name. You can put any name, it doesn't affect the performance.
2. The Campaign parameters can be left by default unless specified on both sides.
3. Click “Next”
IV. User destination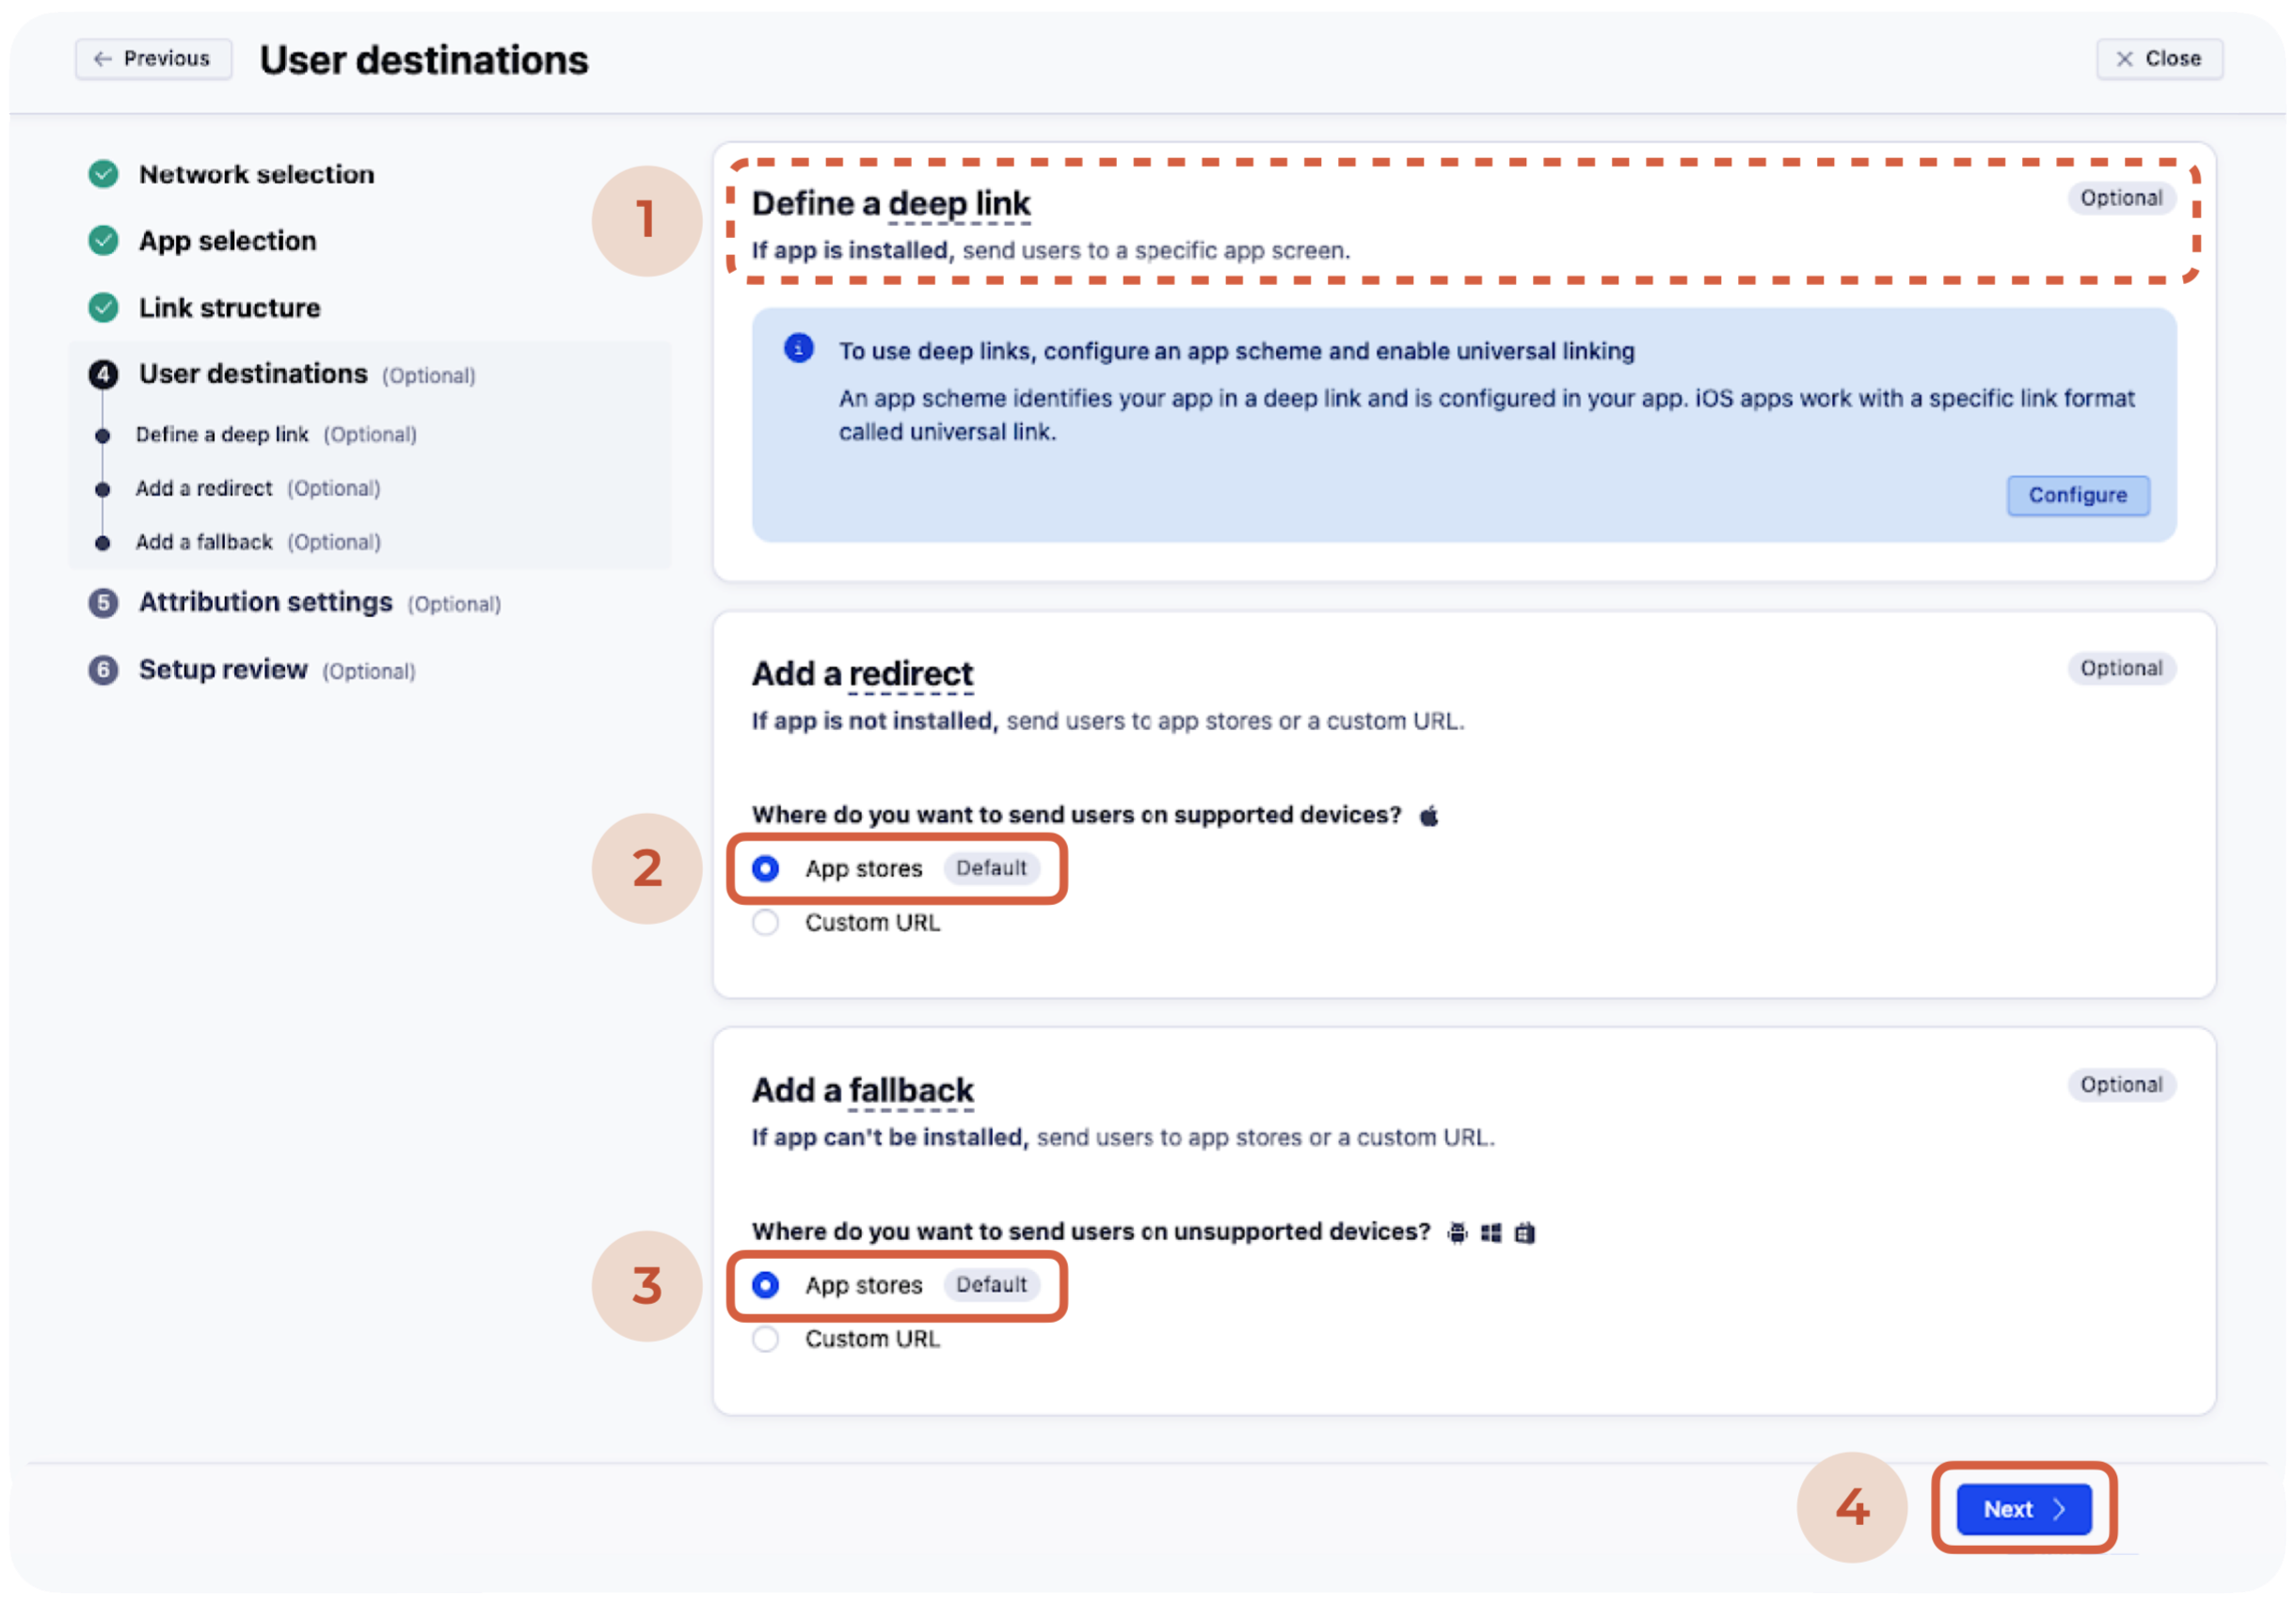
1. Define a deep link – leave by default.
2. Add a redirect – App stores.
3. Add a fallback – App stores.
4. Click “Next”.
V. Attribution settings
New user: attribution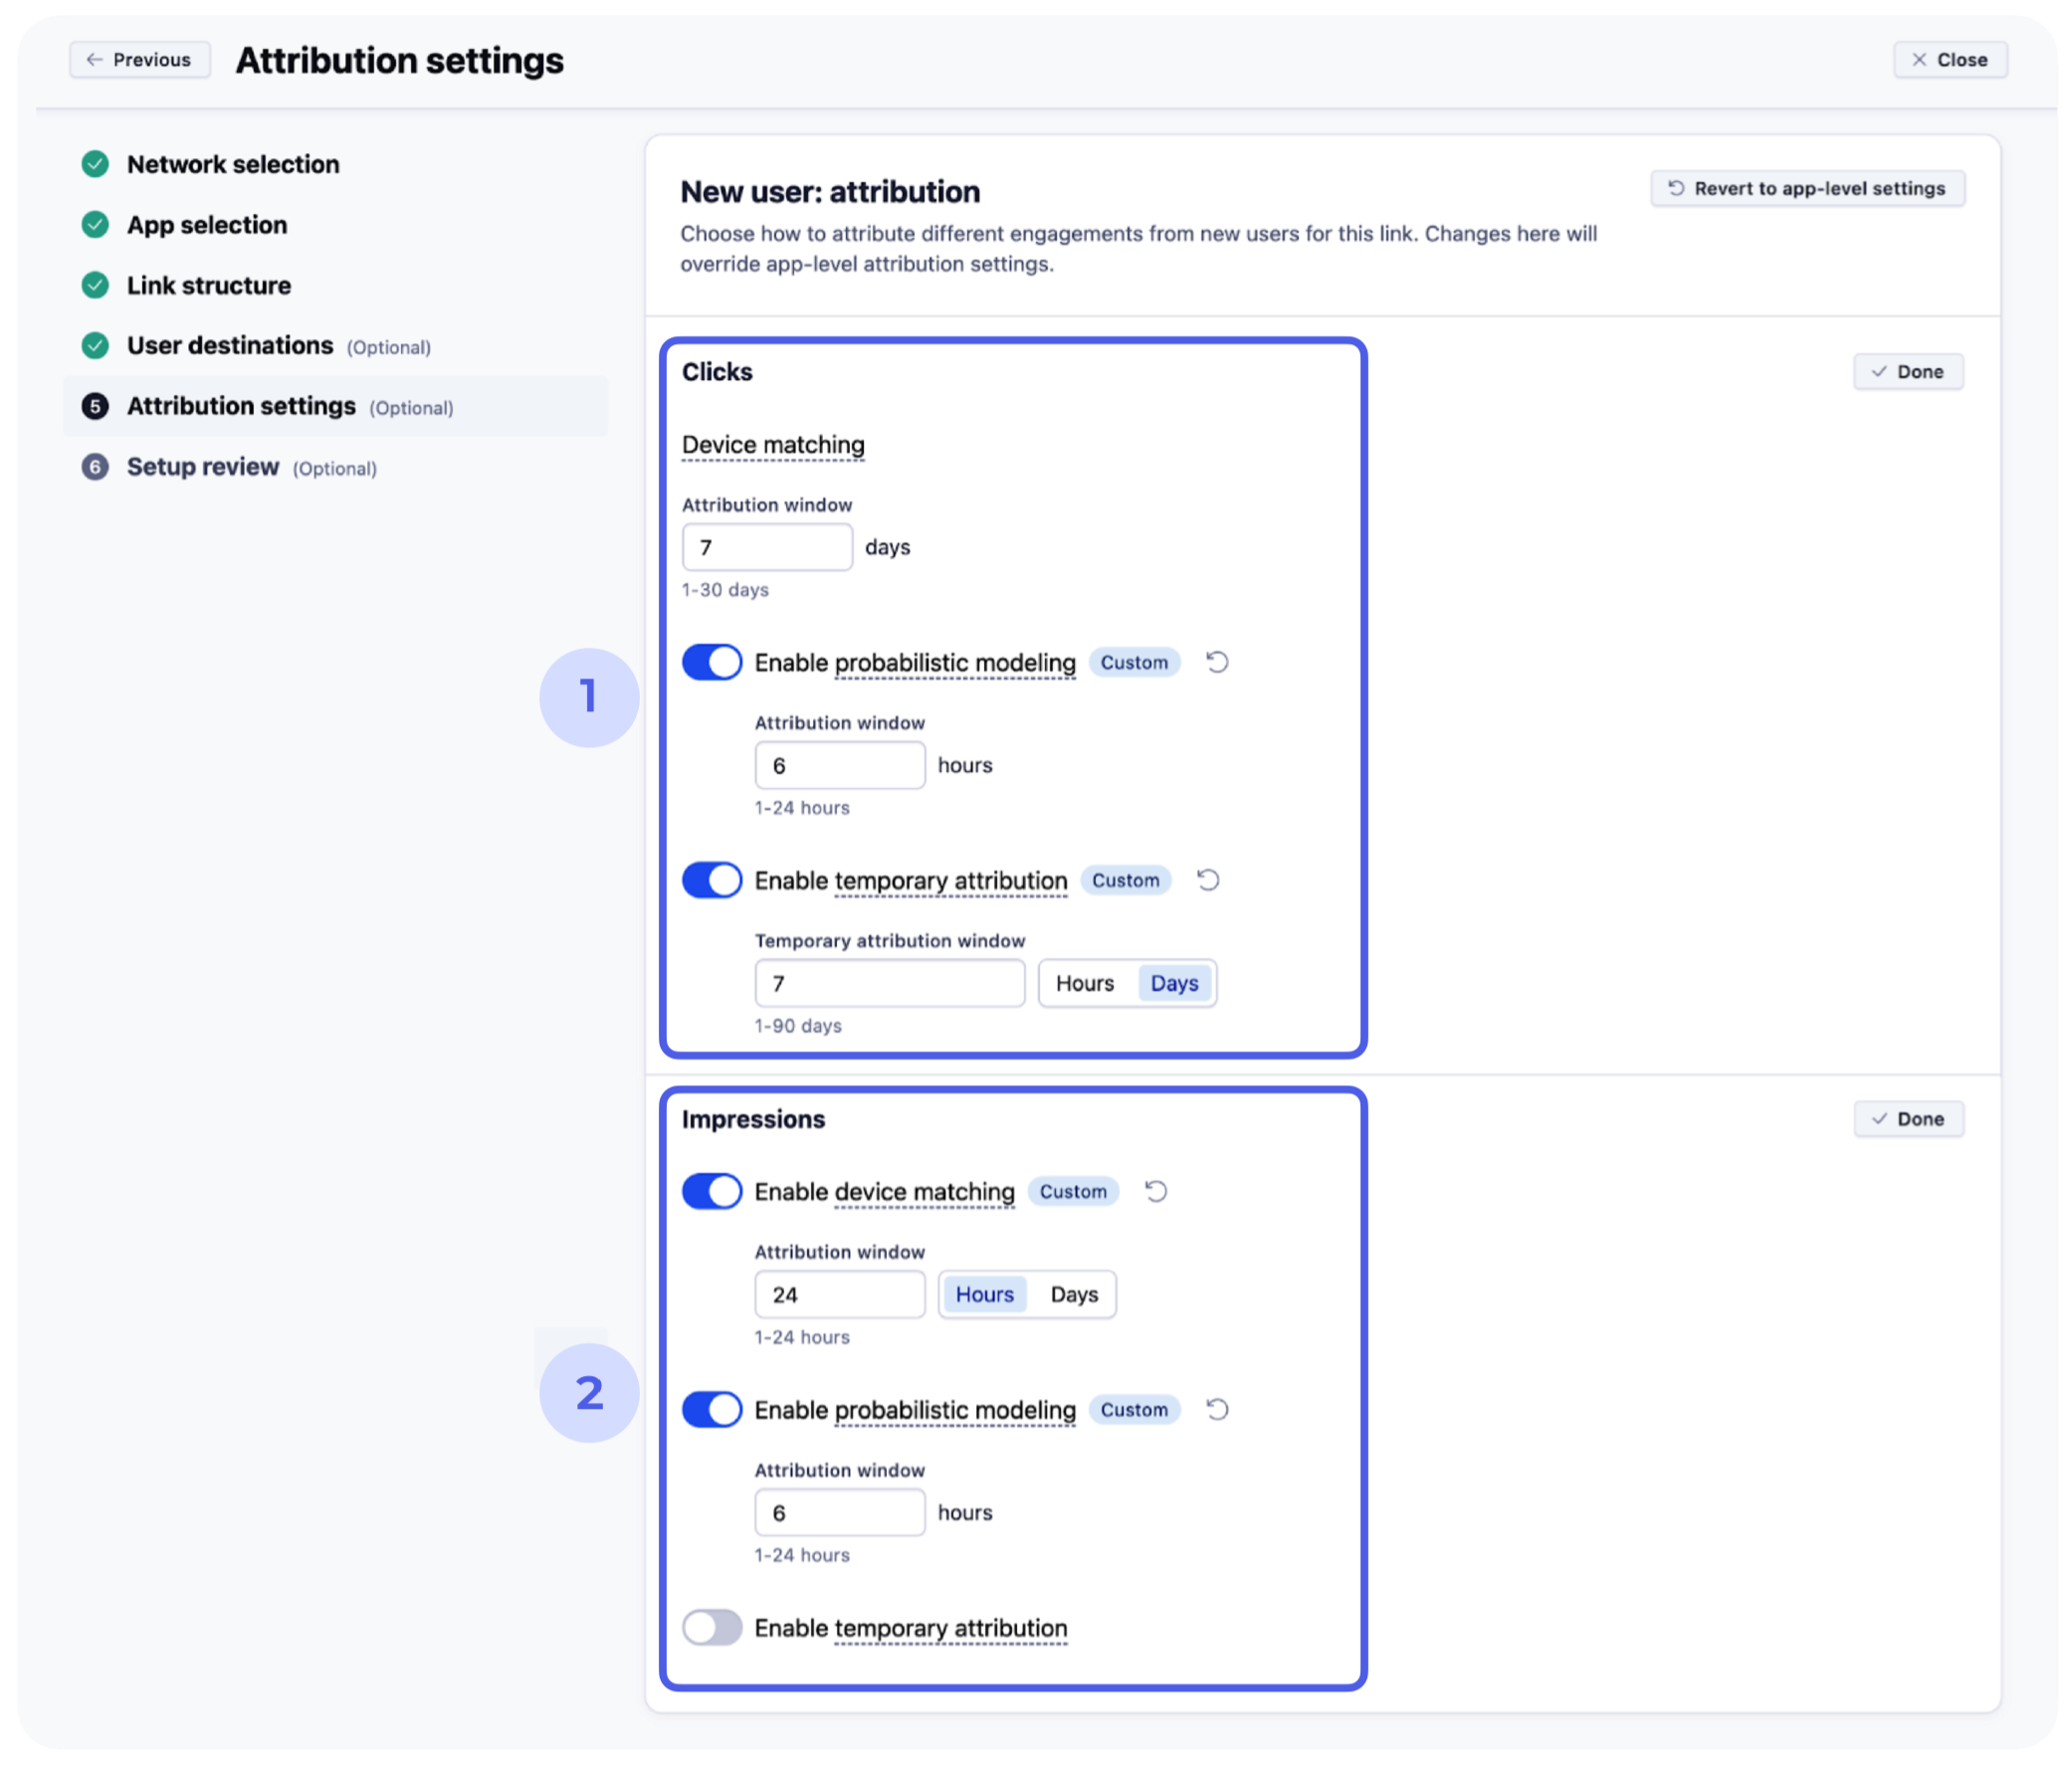
- Edit “Clicks” —
- Device Matching
Attribution window - 7 days - Enable probabilistic modeling
Attribution window - 6 hours - Enable temporary attribution
Temporary attribution window - 7 hours
- Device Matching
- Edit “Impressions” —
- Enable Device Matching
Attribution window - 24 hours - Enable probabilistic modeling
Attribution window - 6 hours - Temporary attribution – leave disabled
- Enable Device Matching
Existing user: reattribution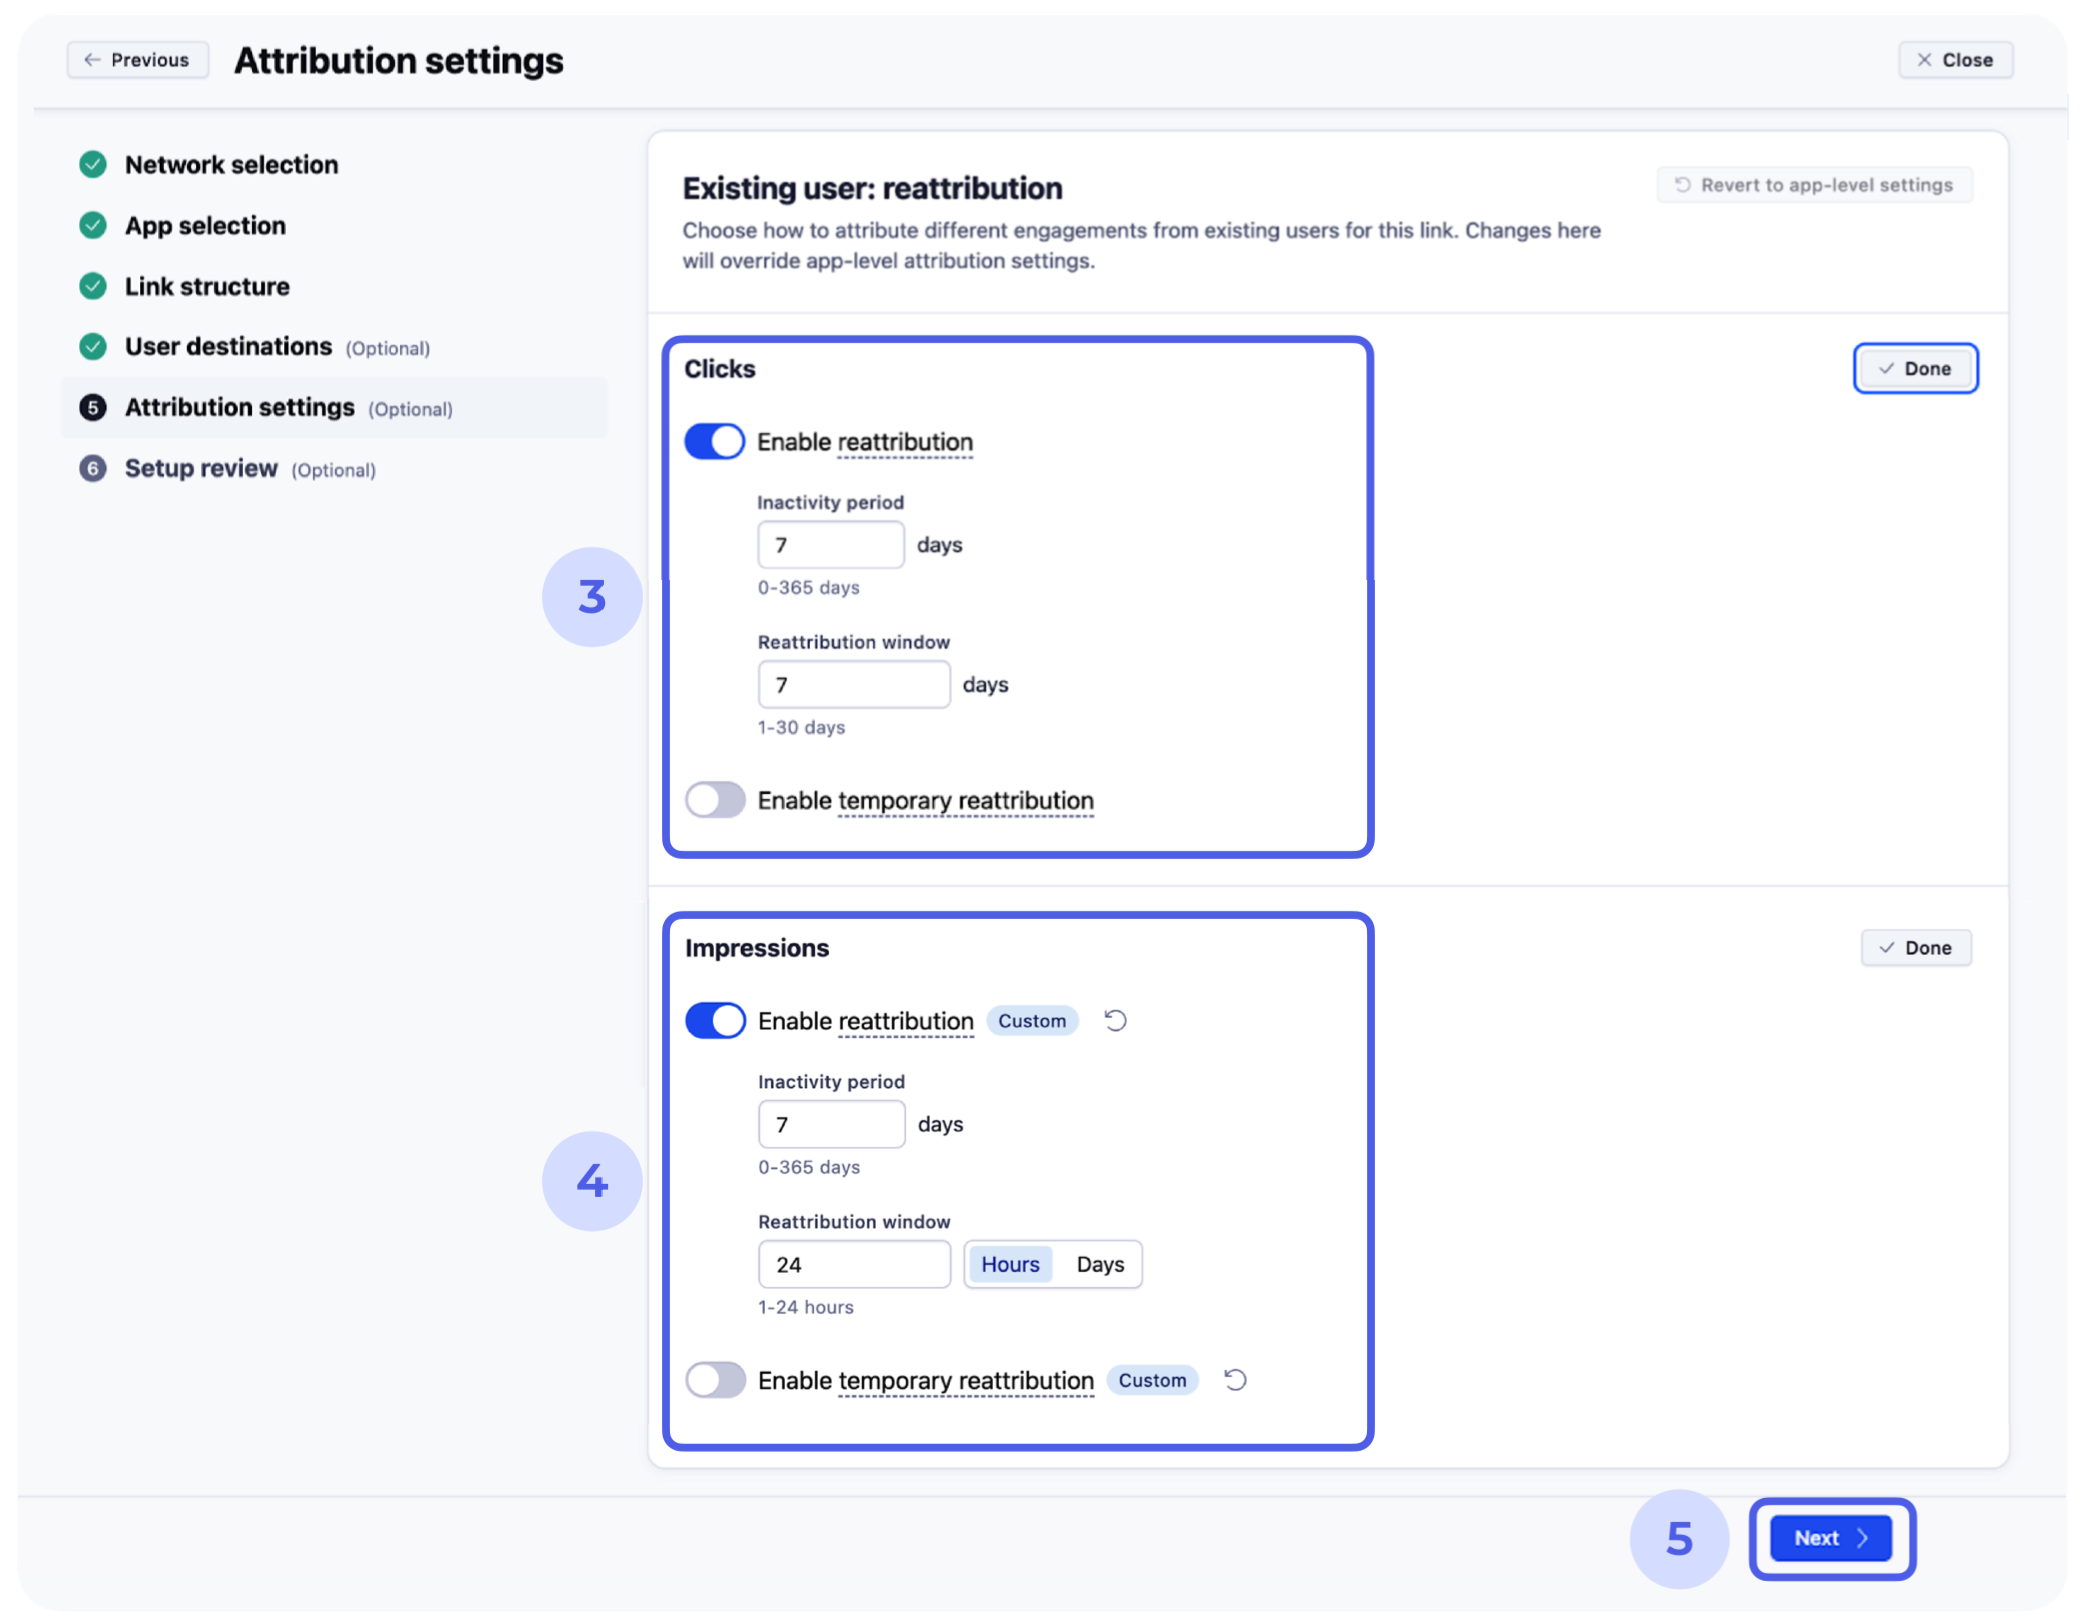
- Edit “Clicks” —
- Enable reattribution
Inactivity period – 7 days - Enable reattribution window
Reattribution window – 5 days - Temporary attribution – leave disabled
- Enable reattribution
- Edit “Impressions” —
- Enable reattribution
Inactivity period – 7 days - Enable probabilistic modeling
Attribution window – 24 hours - Temporary attribution – l****eave disabled
- Enable reattribution
- Click “Next”
VI. Setup review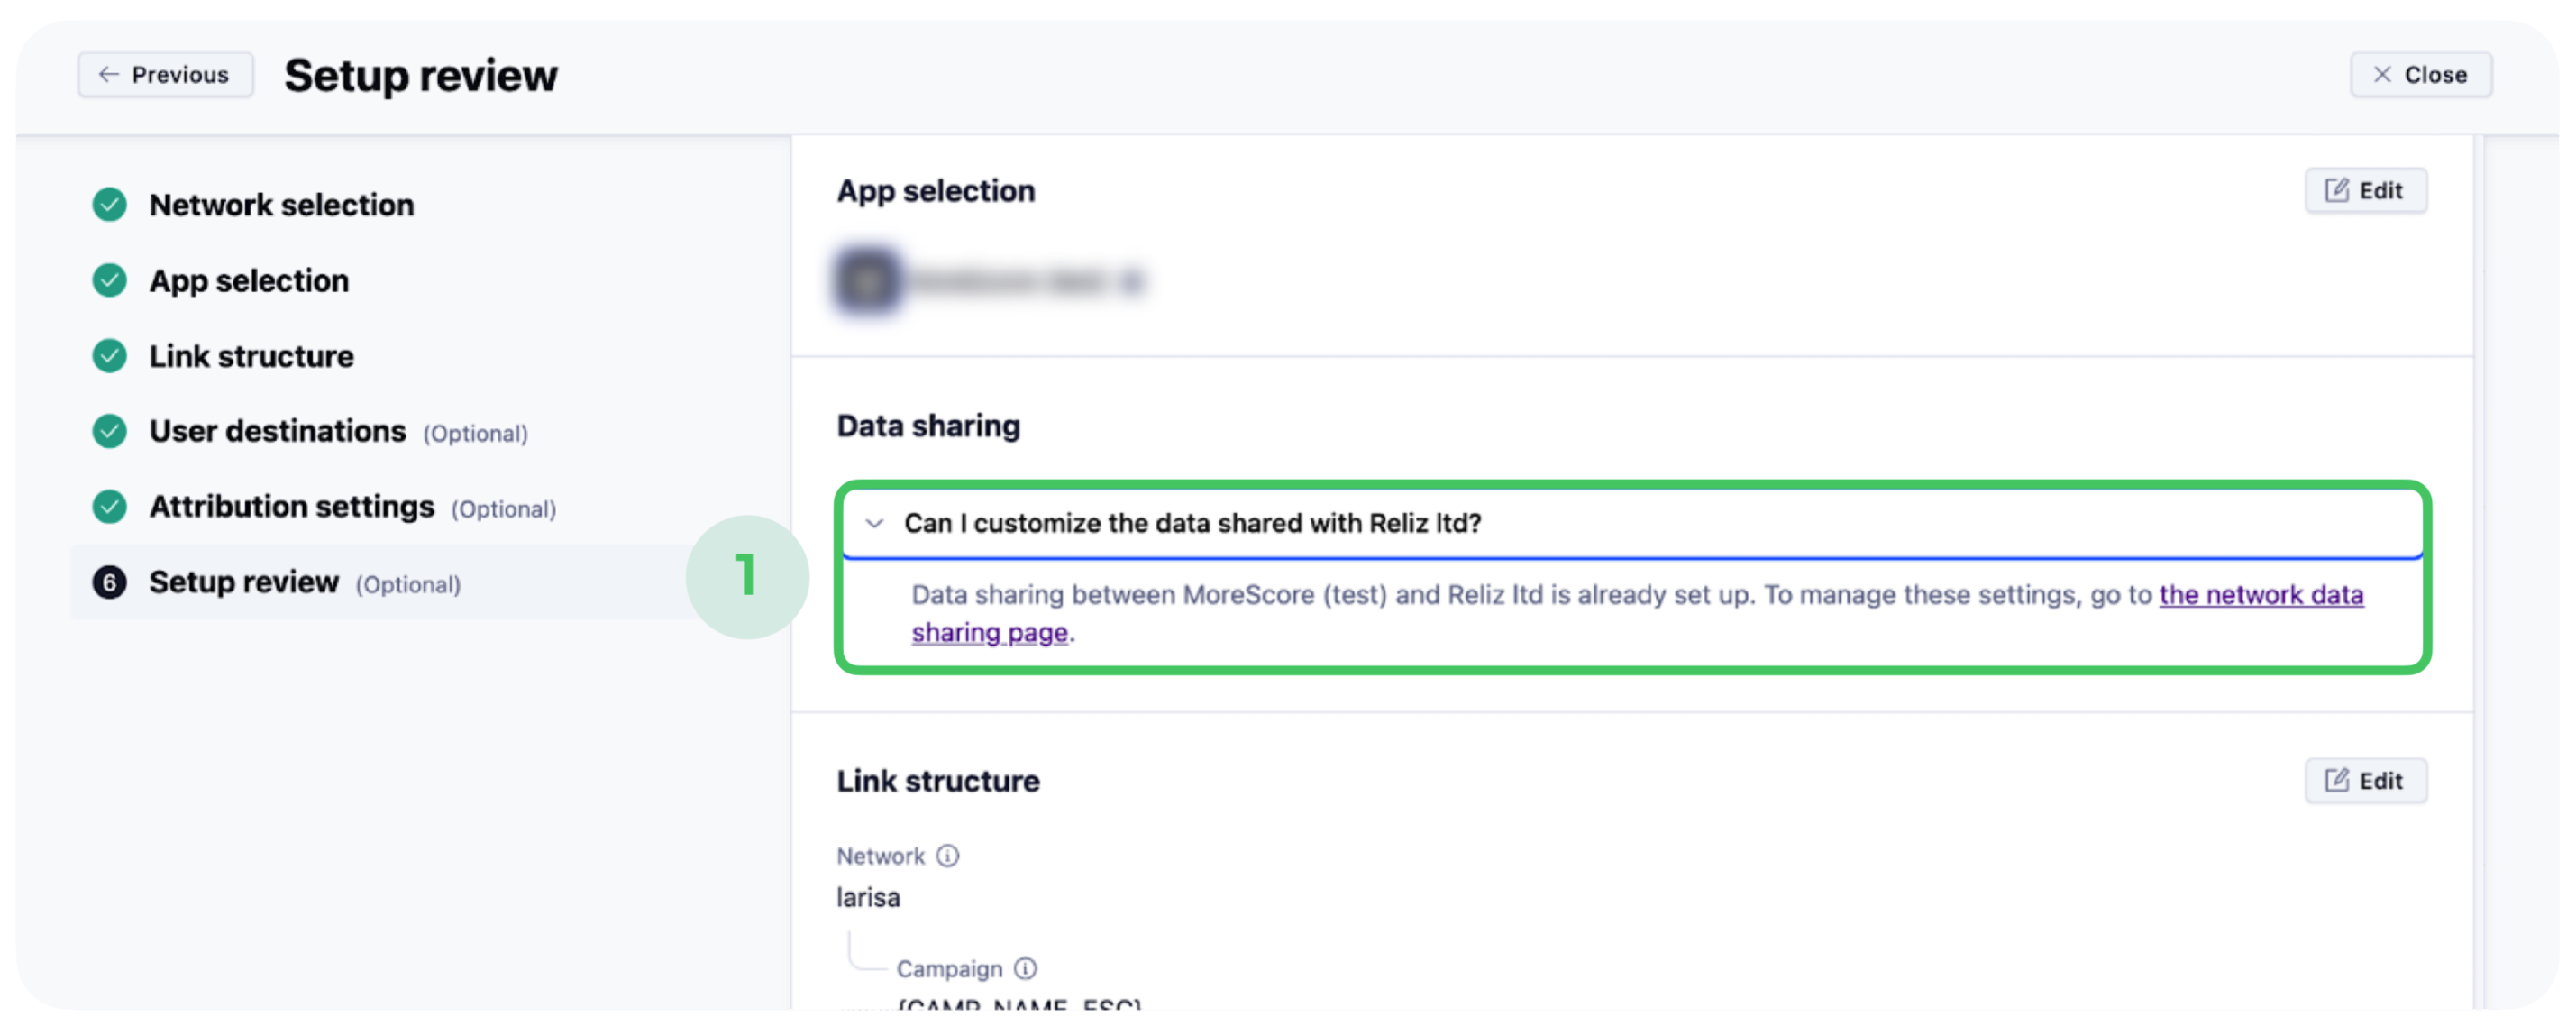
- Click on a drop-down text and go to the network data-sharing page to manage Data sharing settings. You will be redirected to another tab!

- Make sure, you specify settings as on the screenshots above:
- Enable data sharing for Reliz LTD for iOS
What sources of data do you want to share? – Data from all attribution sources - Other settings leave as a default
- Enable data sharing for Reliz LTD for iOS
- Click on “Save” in the bottom corner.

- Return to the tab where you integrated the network, you are in the section “Setup review”. Here you can double-check all the settings you adjusted.
- When it is done, click on “Create link”
VII. Link sharing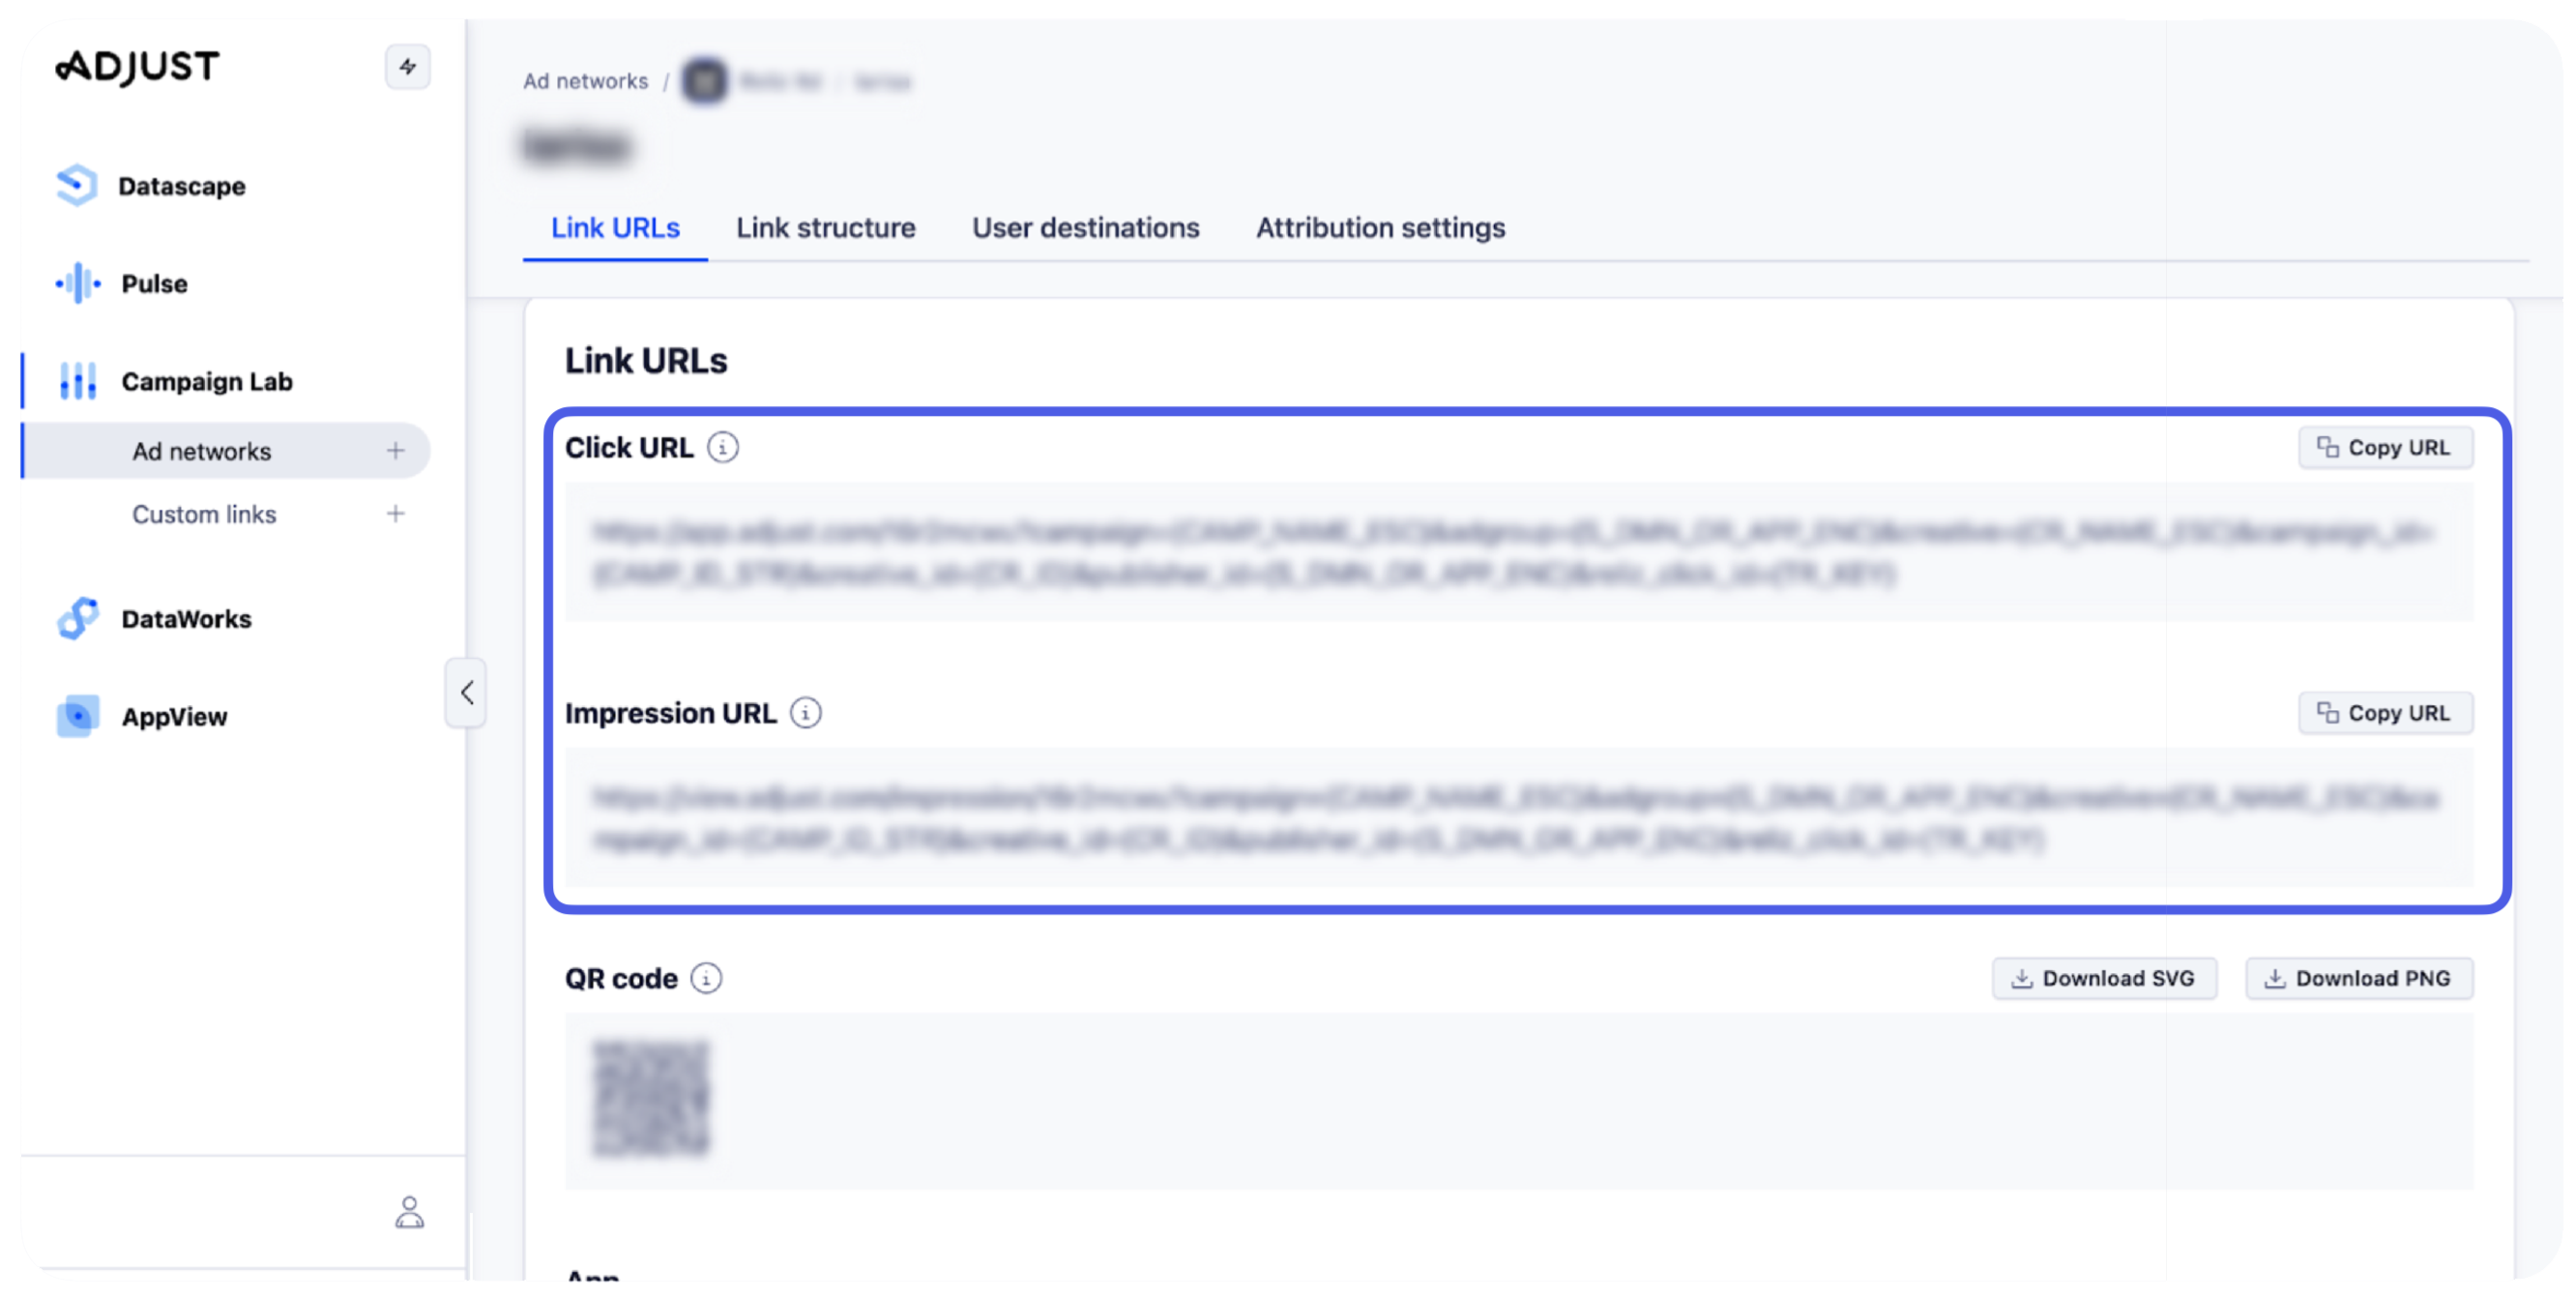
- The link was created and Reliz ad platform is integrated
- Please share with your Client Success Manager from Reliz team Click URL and Impression URL
- Share permissions with adjust@reliz.com

- Tap on “user icon” next to your name and go to Account settings
- Go to “Users” tab
- Add a New user

- Add user details as follows:
First name – Reliz
Last name – Reliz
Language – English
Role – Custom - Click on “Customise permissions”


- Add Role – Custom
- Click on Configure partners and links
- In Partners tab enable the partners you want the user to access
- In Links tab select the created Reliz ad platform link
- To give a user keyword-limited access, select the link you want them to access and enter the keywords you want the user to access
- Save the changes